Showing posts with label Children's Art. Show all posts

Saturday, February 21, 2015

Weaving


Over the past year we have had the great privilege in attending a local homeschool co-op full of beautiful homeschooling and unschooling families. Most families have younger children whom take turns each week to facilitate a workshop. A couple of weeks ago we attended a weaving workshop. One of the mothers opened up her home to us and set up an inviting space for us to weave. We had a really good time, many of the mums and dads got really involved in crafting their own stick weaving and sat amongst the children assisting when needed. I love the way the adults and children came together and all participated as peers in this activity. There were some beautiful creations and I was amazed to see the variety of interpretations within the activity.


 We had so much fun, that we have been doing a lot of weaving together recently. Its a great activity to take with you when you are out. All you need is a variety of yarn and you can find some sticks outside. Here are my girls at the skatepark the other day. While the others are busy riding around, my eldest finds a quiet spot under a tree and busies herself with her weaving.


Wednesday, May 22, 2013

Book Upcycle - Paper Bunting


I know some of you may be dead against cutting up Dr Seuss books but if you think you may be getting rid of a few or have multiple copies, this craft idea is a great way of recycling a childrens picture book.

A long piece of bias binding, an old picture book, scissors and a sewing machine is all you'll need. Cut out triangles of paper using the pages of your children's picture book, pin them in place and fold bias binding over (leave 1 or 2cm in between each triangle) and sew! 

The kids did this one on their own. I assisted them with the pinning and sewing. The kids love it because they get to sew and cut and when its done you can hang it in their room.

Enjoy!

Wednesday, May 15, 2013

Kids Craft Idea - String Art


Here's a fun activity for young kids. All you need is a ball of string some nails and hammer and a peice of wood. It makes a great decoration for the home or kids bedroom and a great alternative to a hung canvas.

You can choose any shape you desire plus there are lots of fascinating patterns you can create which may suit an adult or an older child. Here are some free patterns http://www.stringartfun.com. For a younger child such as mine, it is best to keep things simple. My little sweety chose to do a heart shape. I simply drew the shape and hammered the nails in around an inch apart, tied the string in place and then let her go crazy weaving the string in and out of the nails and 'go crazy' is exactly what she did. She was so excited to create an intricate web out of string and nails and on a large scale it was quite a physically engaging activity. We used a multi coloured wool but any colour or fibre would be fine too.

I love the texture and pattern and have placed it in our living area for everyone to appreciate. The wool paired with the grainy wood brings a warmth to our home. It reminds me of the kind of art I grew up with from the 70s and 80s. I'm so glad this trend is back. Have a go. Get retro.

Monday, May 13, 2013

Plaited Rag Headband


I always have off-cuts laying around of cute materials. I can't part with them but I can never find a use for them either. Until now.

Make a plaited headband out of scraps. Tear off three strips of fabric equal in length and width. My pieces were approximately 1cm in width and 35cm in length for a child's. Begin by knotting the three strips of material together with at least 5 cm overhanging. Plait as neatly as you can. To make this easier have someone hold the end for you while you plait or place the knotted end under a heavy object such as a chair or table leg. Tie a knot at the end. You will need to make sure that the plait is the right length on the subject. Ideally, it should measure from behind the lower ear and extend over to the other this is how to gage the length. Next you need to attach a length of elastic. I used white lacey elastic to match my fabrics. Attach one end of the fabric to the elastic by sewing it in place on the underside of your fabric plait just above the knot. Then cut two of the overhanging strips of fabric away. Use the remaining fabric to wrap around the knot and where the elastic is attached and hand sew at the back. This covers all the joinery and gives a more see less finish. Next measure the amount of elastic you need to reach around the back of the head with out stretch. This should be a good amount of stretch once you take into account the length lost in overlap. Cut and sew above the knot on the under side of the plait. Then repeat the process of covering the knot and joinery with matching material overhang.

You should now have a nice rustic looking headband and if you've used some of your favourite off cuts, you should be very happy with yourself! These make great gifts and would be great to coordinate with another handmade item in the same material.

Thursday, May 2, 2013

Hand Drawn Geometric Mug

This is my take on the hand drawn mug. This pattern is so simple to draw. Simple lines, fill in with zig zag and colour every second one. It doesn't matter if it is uneven. That just makes it more interesting to me. Have a go making your own.

Get a blank mug, a permanent marker and go crazy. Make sure you bake them in the oven at a high temperature for at least 10 minutes before attempting to wash them or you risk loosing your precious artwork! I would hand wash them to be on the safe side.

For a kids craft activity, get some coloured permanent markers and get creative...


Tuesday, April 23, 2013

Earth Day Activity - Miniature Garden


A potted miniature garden is such a fun, easy activity to do with young kids. We did this today to celebrate Earth Day. Our generous neighbour allowed us to grab some offcuts of succulents growing in her yard and we replanted them in a large round pot. The kids had so much fun decorating the garden with miniature trees and creating tiny stone pathways leading to large stone houses at the end. They placed small terra cotta frogs and mushrooms in the garden and enjoyed watering it when it was completed. This would be a great activity with any aged child and relatively simple to create, with little cleanup or preparation involved. An imaginative activity that could take you anywhere really...

Friday, June 22, 2012

Kids Craft Idea: Button Craft


Here's something else you can do with your buttons...


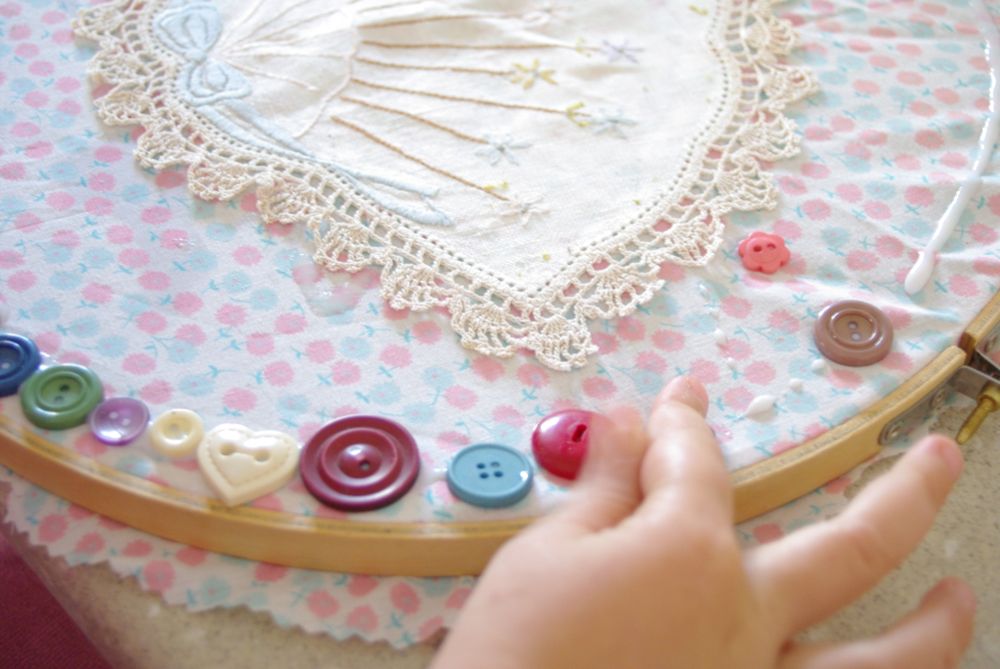
My children love textiles, and this is a great alternative to collage using textiles, buttons and handmade op shop finds. We used a crafters ring to create a canvas and then glued all our materials onto it. Let it dry and it is ready to hang.


Monday, June 4, 2012

Kids Craft Idea: Beading with Buttons

It might sound boring to us adults but beading with buttons can be quite exciting for kids. There is so much value in sorting through different shaped and coloured and textured buttons. There is the excitement of finding treasured gold buttons, or the rare beautiful pearl button or the collecting of matching buttons.  
 It can be tricky for little fingers, so great for practicing fine motor skills.
 And a final product as individual as the child who made it.

Saturday, June 2, 2012

Friday Love

Today I am grateful for...


All the lessons learned this week
The lovely rain
Heaters and ugg boots and the layers of blankets that kept us warm
A crawly baby to keep me on my toes and always make heart skip a beat with the sheer cuteness of him
Poppy who learnt her that all her hard work paid off when she went and bought her play makeup table with the money she earned doing jobs around the house, (a lot of lessons learned here)
the kindness of strangers
My husband who did so much kid wrangling to give me a break even when he has been so short on time and breaks himself
The spaghetti he made at 6:00 in the morning so I wouldn't have to
Despite the hours spent sitting by the toilet and the piles of washing, the progress Ruby has made toilet training
Potato stamps, play dough and collage
A good book to read
Wine and chocolate to relax after a long week.

Thursday, May 3, 2012

Kids Craft Idea: Clay Imprint Vase


This is a great kids craft idea to introduce young kids to clay and ceramics. It looks at form, function and texture and can be accompanied by a nature walk a treasure hunt to source materials. I did this when I was 4 and enjoyed it so much that to this day I remember the whole experience. 

Instructions:
Get some light coloured air drying clay. Roll it out on a plastic covered board. Use shells, lego blocks, bottle caps, branches to press into the clay to create interesting textures.


 Trimmed the edges with a plastic knife and rolled into a cylinder pressing overlapping clay gently together. (If you want more secure joinery, cross hatch where clay will overlap, with a toothpick or scure and lightly paint with water before joining two surfaces together). Attach a circle of clay for the base, neaten edges with a knife once attached. Cover loosely with plastic and leave to dry for 48 hours outside. When the clay is completely dry you can paint, but be sure not to use too much water or paint or the clay will soften. We used sparkly nail polish as well for a nice bling finish! Make sure to glaze it if you want to use it with water.


It also makes a nice pencil holder ...


Happy crafting...

Tuesday, March 27, 2012

Kids Craft Idea: Put Your foot In It


We had quite a bit of rain last week and that left us stuck in the house. We ventured downstairs to get creative and we ended up painting with our feet. It was great, the girls got a bit more energy out and got to get very messy as well as creative. We had some large cardboard boxes that we opened up and spread them out on the garage floor. No crazy rock and roll music or drip painting like Pollock but the girls had plenty of fun.


Thursday, March 1, 2012

Kids Craft Idea: Spaghetti Painting


Want to do some painting with the kids? Mix it up today with a sensory twist.


 Instead of paint brushes use spaghetti! This was a cool way to paint and the kids loved it. A little too much at times. The pasta was warm and they made a meal out of it before getting their pasta in the paint... or what remained.


Once again, we had a ball and got very messy indeed. So that's dinner and craft in one! Yay! Now I'm wondering what else we can eat and craft with... Any ideas?


Tuesday, February 28, 2012

Kids Craft Idea: Tin Bird Feeder

This is a pretty simple, straight forward craft idea that could be as elaborate and decorative as you like and could lead to more learning opportunities.


What you will need:

A large tin, thick twine or rope and bird seed. You will also need some plastic and glue to keep in place. We used an empty milk carton.


Directions:

Remove both ends of the tin with a can opener (make sure there are no sharp edges sticking out). We used a tin with a lid so only one end needed to be removed. Trace a circle around the tin onto a piece of plastic. Cut the circle out and then cut in half. Glue or tape the plastic pieces to the ends of the tin to create a troff type enclosure. When the glue has dried loop a long piece of twine in through the cylinder and use it to hang from a branch. Place bird seed inside. Now wait patiently for the birds to find it...


You can decorate it as little or as much as you like and you could take photos and study the kinds of birds who visit.

Tuesday, February 21, 2012

Kids Craft Idea: Puffy Paint

This is a fun craft activity for something a bit out of the ordinary. Make puffy paint. The kids enjoyed making it just as much as using it. Be sure to make plenty if you are going to make a few different colours.


Instructions
  • equal parts of flour, salt, and water
  • food colouring or tempera paint


Mix dry ingredients thoroughly and add water. Divide into small containers for several colours then add food colouring into each container (you can also use tempera instead of food colouring). Put the paint into squeezey bottles for smooth lines or apply with a paint brush for a more painted and textured effect. Have fun and get messy!

Thursday, February 9, 2012

Photocopy Art

Here is a quick and easy craft idea that your kids might enjoy at any age. Open your photocopier, and arrange an assortment of objects on the glass surface, shut the lid as best you can and print in black and white. High density or contrast works best. The copier will print out an interesting photocopy of your arrangement which you can add to using paints, crayons, pencils etc for an interesting artwork or leave as is for a simpler look or series of prints.
You can experiment as much as you like. You could try objects with interesting textures, transparency, different shapes and contrasting colour or patterns. You could even try printing on the same paper several times for a layered effect... There is lots to learn about and is heaps of fun.


Monday, January 30, 2012

Kid's Craft Idea: Clothes Design


You have to admire children for their honesty.

I made a simple skirt which was a little too drab for my expressive four year old. "We need some decorations" she told me. So she pulled up a chair and said "Okay now, let's get to work." After scrounging around through my button collection and fabric off-cuts she soon came up with a pocket design of her own to jazz up her new skirt. And I can honestly say, I'm glad this little girl knows what she wants and is not afraid to tell me so.

Thursday, January 19, 2012

Lessons Learned in Mess


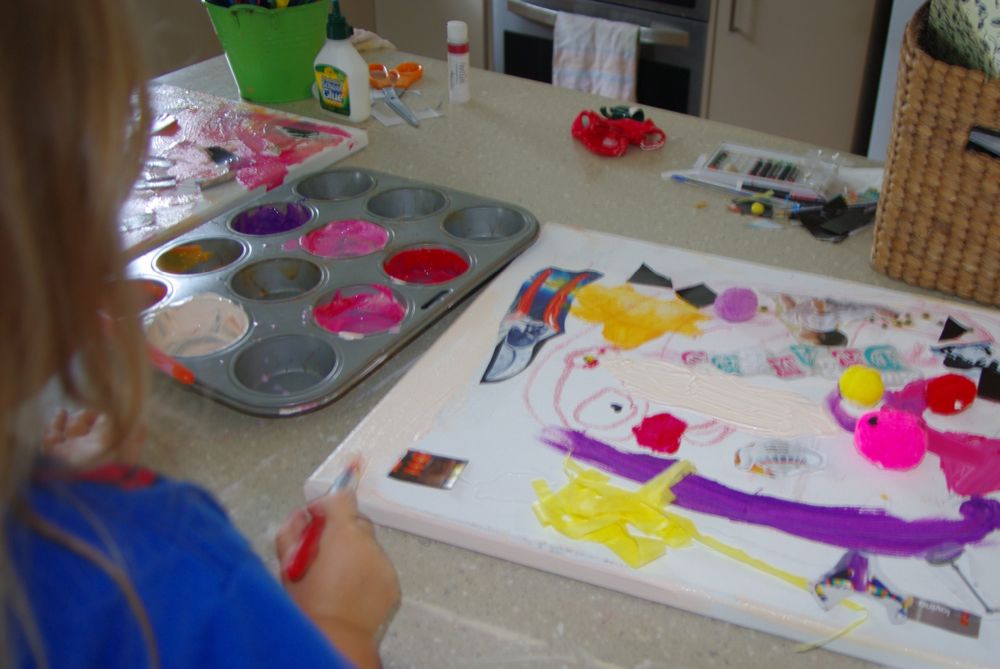
Painting with the girls is absolute Choas! There's shouting, dropping of things, requests, demands, glue in mouths, hair, spills, messes to wipe up and paint EVERYWHERE! These are the things I often remember before I get the paint out. But amongst the chaos, so many lessons are being learned; what does red and yellow and white make when mixed together? what will happen if i paint over this? or on that? or spread it with my hands?... or put it on my face? Also, is this ok that I am getting messy? Do I like the look or feel of this? Is this good?


I am learning too... I am learning that mess can be good, choas can be healthy, staying calm can let my kids know that this is good, this is fun and there are no rules here! I'm also learning to let go and just watch. Even though I want to get involved and I have my own ideas of what should go where and what colours would look great, I have to keep my mouth shut. This is not my artwork and my values may not be theirs, I am only assistant to the artists providing the tools (I imagine this is true for most home education). I am so amazed, these kids are teaching themselves and growing more confident in their freedom! And I am learning new ways to do things too by just watching.


And here I am again, surprised and inspired by the creativity and originality of my own children! Never mind the mess!

Wednesday, January 18, 2012

Pretty Play Bag


My girls love little bags to collect things, take when we go out (or pretend to) or just to wear like Mum. Here's one I made for my two year old. Its really quick and easy to make and I made it from off-cuts of old material and leftover ribbon.

Directions:
Cut a rectangle of material 30cm x 15cm
Fold in half right side facing in
Sew a straight line down the two sides
Fold over top edge and sew a 1cm seem
Turn inside out
Sew ribbon over the seem line with a zig zag stitch for decoration
Attach required length of ribbon for a shoulder strap.
(I like the strap to cross over the body and sit just under the hand so it is easy to access)

...10 minutes later.

Wednesday, December 28, 2011

Ready for Wrapping


After our family holiday I hit the sewing machine hard and sewed these little beauties... More Travel Art Folios for the kiddies in our families. I loved making these. Making something for someone else is very fulfilling and I hope that this is something I can encourage my kids to do also as they grow older.


I remember having something similar to this when I was 5 and I thought it was awesome, although it was not hand made, I felt like a real artist. I hope that they will be enjoyed and loved and used to bits and that many ideas will flourish and that many creative moments occur between these pages.